Showing posts with label diaper-sewing. Show all posts

Sunday, October 7, 2012

Online Free Downloads

* If you are new to my diaper-sewing blog, please start HERE.  My pattern templates were not designed to be used with rolled/zig-zagged elastic or the tack&turn cased elastic method.

I now have a YouTube channel as well: ArfyMakes YouTube channel
I do live-streaming on Wednesdays at 2pm Pacific time, and you can make requests for what I'll sew, or I can help you trouble-shoot your own projects.

My diaper pattern templates are all on google docs.
DO NOT allow your print settings to "scale to fit!"
If there is an option of choosing a printed scale percentage, then just type 100%.

I have also posted Projector-friendly PDFs for download as well.

Templates : Blog Posts and/or Video tutorials showing them sewn-up


One-Size PUL-outer Diapers (Pockets, AI2s, AIOs)


Newborn PUL-outer Diapers (Pockets, AI2s, AIOs)


Universal NB Squaretab (approx. 6-11lbs)


Sized PUL-outer Diapers (Pockets, AI2s, AIOs)

Sized Squaretab Diaper Templates  X-SmallSmallMediumLargeX-Large :  pocket AIO pictorial


Fitted Diapers + (require a moisture-barrier cover)


M-L Fitted : (14-30lbs) post

NB/S Fitted : (6-14lbs depending on materials used) post, VIDEO

NB/S Serged Fitted : (6-14lbs depending on materials used) pictorial, VIDEO


PUL Diaper Covers


XL FOE Cover (requested)

NB/S FOE Cover : originalupdated (+now w/ guides for double gussets by request)


Miscellaneous

Wednesday, February 22, 2012

Squaretab AI2 design into a Pocket Diaper


Outside:

Inside:

These will be your two fabric pieces that make up your pocket diaper inner. Stitch down the finished sides as shown below.

Secure your two pocket fabric pieces together leaving the defined pocket opening shown below.
Sew your laundry loop tabs in place (if using H&L).

Turn over your joined inner pocket pieces and tack your wing hook & loop tabs in place between the two layers (if using H&L). They will flip outward when the diaper is turned right-side-out.

Sew all the way around and turn through the pocket opening. Then add your top-stitching and elastic casings as marked in the AI2 template. :)

** You can easily add a strip of PUL at the front of the inner pocket fabric as well like Bumgenius and Sunbaby do. You would incorporate that just before you attach the pocket body with the top flap pieces.

OR... make it into an AIO...

Monday, August 15, 2011

Amazon Contour Fitted Diaper #2


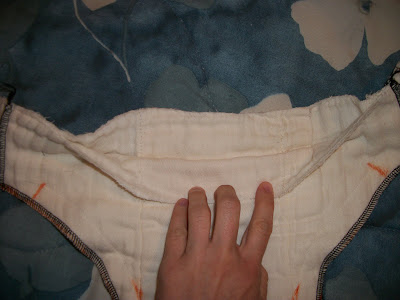
Today's amazon contour-to-fitted tutorial uses two cotton flannel contour diapers to make one heavy-duty fitted diaper. :) I'll post up a better finished photo after diaper laundry when the marker is washed out. ;)


What you'll need:
- 3/8" braided elastic
- 2 amazon cotton flannel contours
- safety pins
- sewing machine (only a straight basic stitch is needed)
- thread (I used contrasting for more visibility, but white would look VERY clean)
- scissors

(optional - snaps, velcro, or diaper pins)

Lay one contour over the other.
Trace or sketch your general diaper shape leaving seam allowance.
Cut your two body panels out together.
Cut off the 4 largest chunks of the remaining scrap pieces to be used to extend the wings.
Sew them onto the wings.
(Sew your velcro now if you are doing velcro closures.)
Lay both diapers together with the "ugly sides" out and trim up the wing and back shape.
Sew (or serge) around all but the middle 7" at the back.
Turn right-side-out.
Sew your leg elastic casing channels.
Thread your elastics through with a safety pin, tack, stretch, tack, and trim...
Sew your back elastic casing channel.
Thread and tack your elastic, sew up the back/top of your diaper, and do all your top-stitching.
Add snaps if desired. I did a two-rise fold-over rise snap layout. (the marker will all wash right out)

After about an hour of wear, they rest a little low on my 28lb 36" tall toddler's hips, but they fit fine and move well with her. There are two snap settings wider remaining in the hip width too.
I had her crawl around the floor to make sure the rise was high enough over her butt for a larger crawling baby, and they passed that test just fine too. :)
I would guess that the total materials cost for this diaper are under $1.20. Considering the cost of the elastic used, the thread used, the snaps used, and the two contours ($0.67 for them). It would be under $1 if pinned. It was very quick to make too.

Tuesday, August 2, 2011

Basic Serged Prefitteds


You'll need:
prepped prefolds (any size)
braided polyester elastic (1/4" or 3/8")
a safety pin
washable marker
a sewing machine and a serger (zigzag or overlock can be used as well, but the edges won't be quite the same)

Draw out your rough diaper shape leaving enough room outside the middle seams for your elastic casing (around 1/2-3/4" depending on the elastic you'll use and your prefold size). You'll be using those rectangles on the left edges to extend your wings. The outer arcs will be used for a lay-in doubler/soaker.

Cut off the existing serged ends.
Serge the rectangle pieces to the wings, and then serge down both sides leaving room for your elastic casings. Mark your elastic casing guide points (optional).

Now for those edges...

Unfold the fabric and lay the two sections down together (it should be 4 layers total). Then serge around it making an oval narrow enough to fit inside the diaper's leg casings.

Now back to the diaper's body...
Sew your casing extensions.

Mark your back elastic casing guides.

Rip enough of the prefolds layering seams at the back to open up to the new casing guides you have marked.

Sew your back elastic casings.

Use a safety pin to guide your elastic through the leg casings.

Tack down securely on one end.

Pull to a good tension (I do it so that I can still easily open it all the way but there isn't extra slack). Pin in place about an inch from your guide mark.

Tack down the other end of the elastic and cut off the excess.

Repeat on the other side.

Feed your back elastic through.

Tack down and pull taught the same way you did with the legs elastics.

Tack the other side and serge up the top/back of the diaper.

If you won't be doing snaps, you can serge the front at this point as well, and you're done! Ready to snappi or pin. :D

If you WILL be doing snaps, the following is for a 2 level fold-down rise.
(I use plastic/resin size 20 KAM snaps and KAM snap pliers.)
The snap caps will be inserted through these existing openings:

I use a punched cardboard template for all my snap applying needs. ;)

The top row will be applied on one side, and the bottom on the other (front and back).

Hidden caps (through 4 layers in the middle and 2-3 layers on the outsides).

Front:

Back:

Then just serge up that side and you're done! Just wash to get out the washable marker, and they're ready to use!