Tuesday, February 24, 2015

Double-Opening Pocket Diaper

I now have a VIDEO tutorial for this style of diaper on my YouTube channel!


For this tutorial, I used my NB/S Squaretab template (not to be mistaken for the Universal NB).

I started my cutting out a full panel of suedecloth for the pocket diaper stay-dry inner fabric.  Then I cut out two rectangles to make mail slot style pocket openings in the inner.  However, after sewing this diaper up, I really think that a front envelope pocket would have been much nicer for the front pocket.  :)
 Sew skinny long rectangles in the middle where your pocket openings will be.
 Cut and notch corners.
 Flip through.
 Sew down.

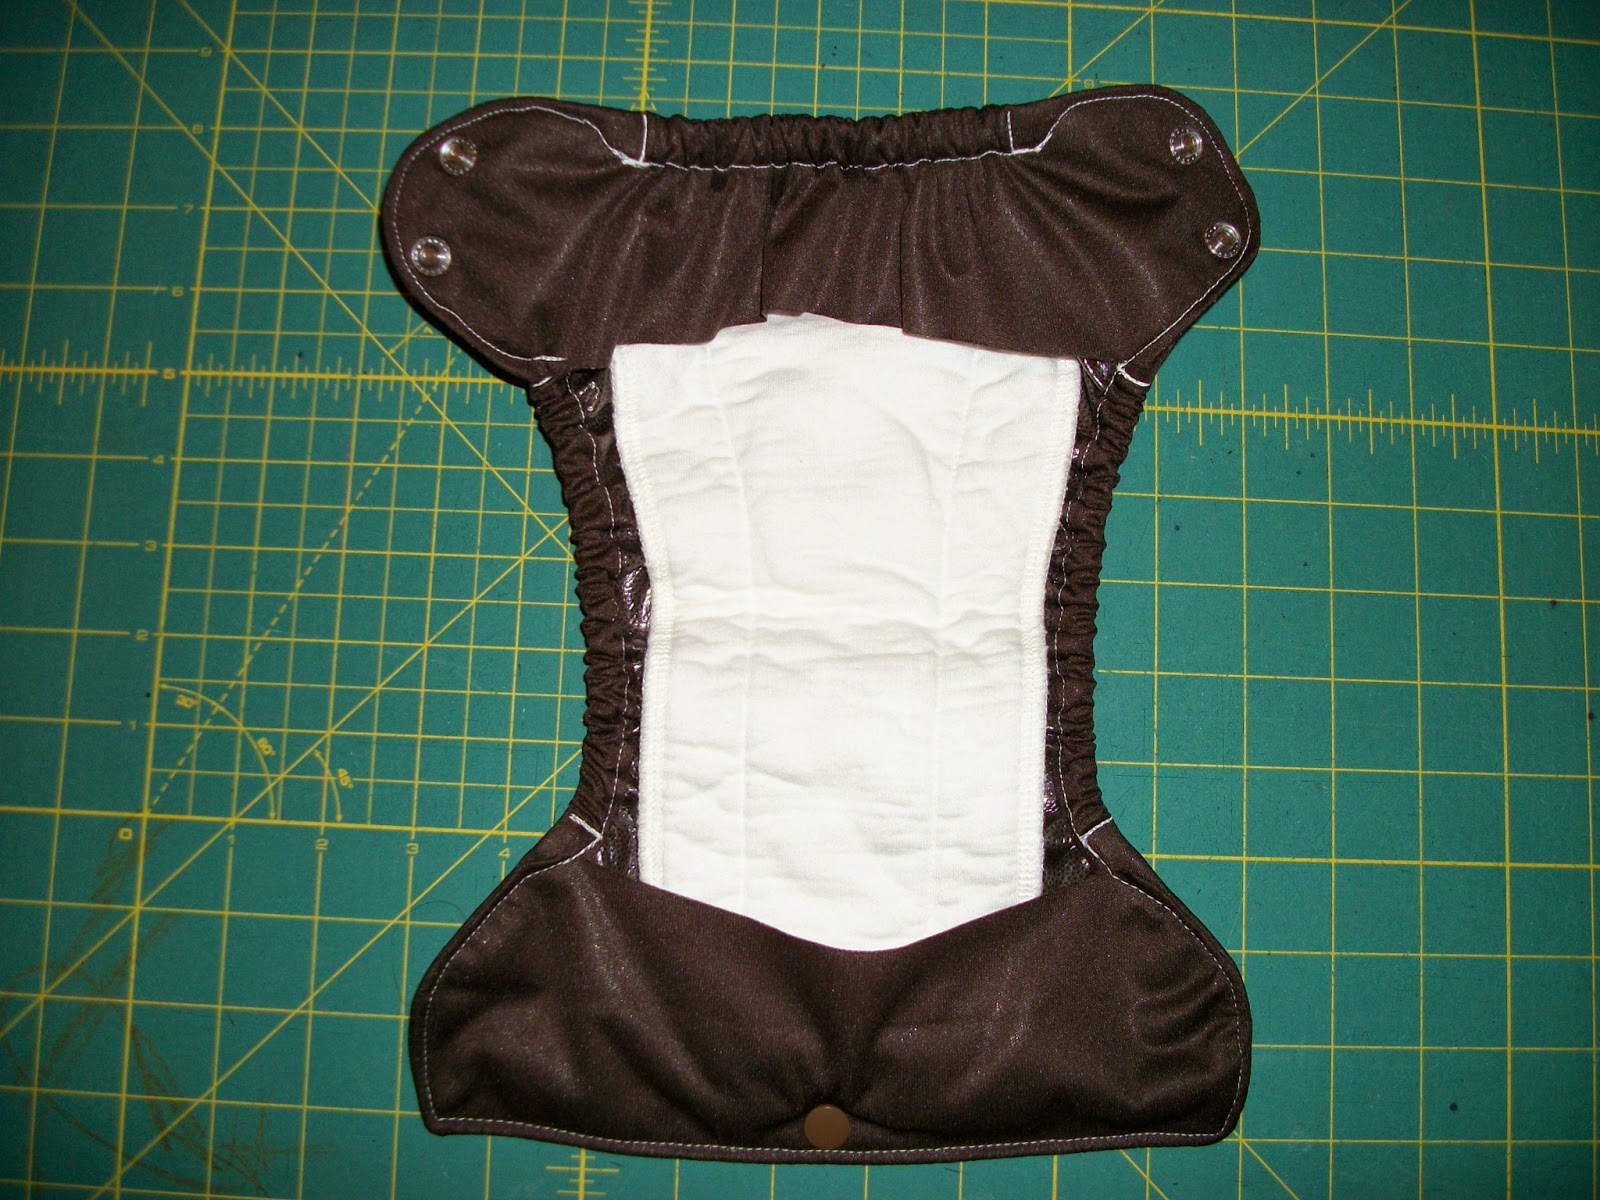
At this point, you could sew your front to your back and finish the diaper up as just a pocket diaper.  However, for this one (for that diaper cake give-away again), I decided to make it into a pocket AIO and added a sewn-in soaker to the top pocket.  I also included a newborn size microfiber insert with the diaper to use as a doubler.

 Soaker sewn to the back of the pocket opening.
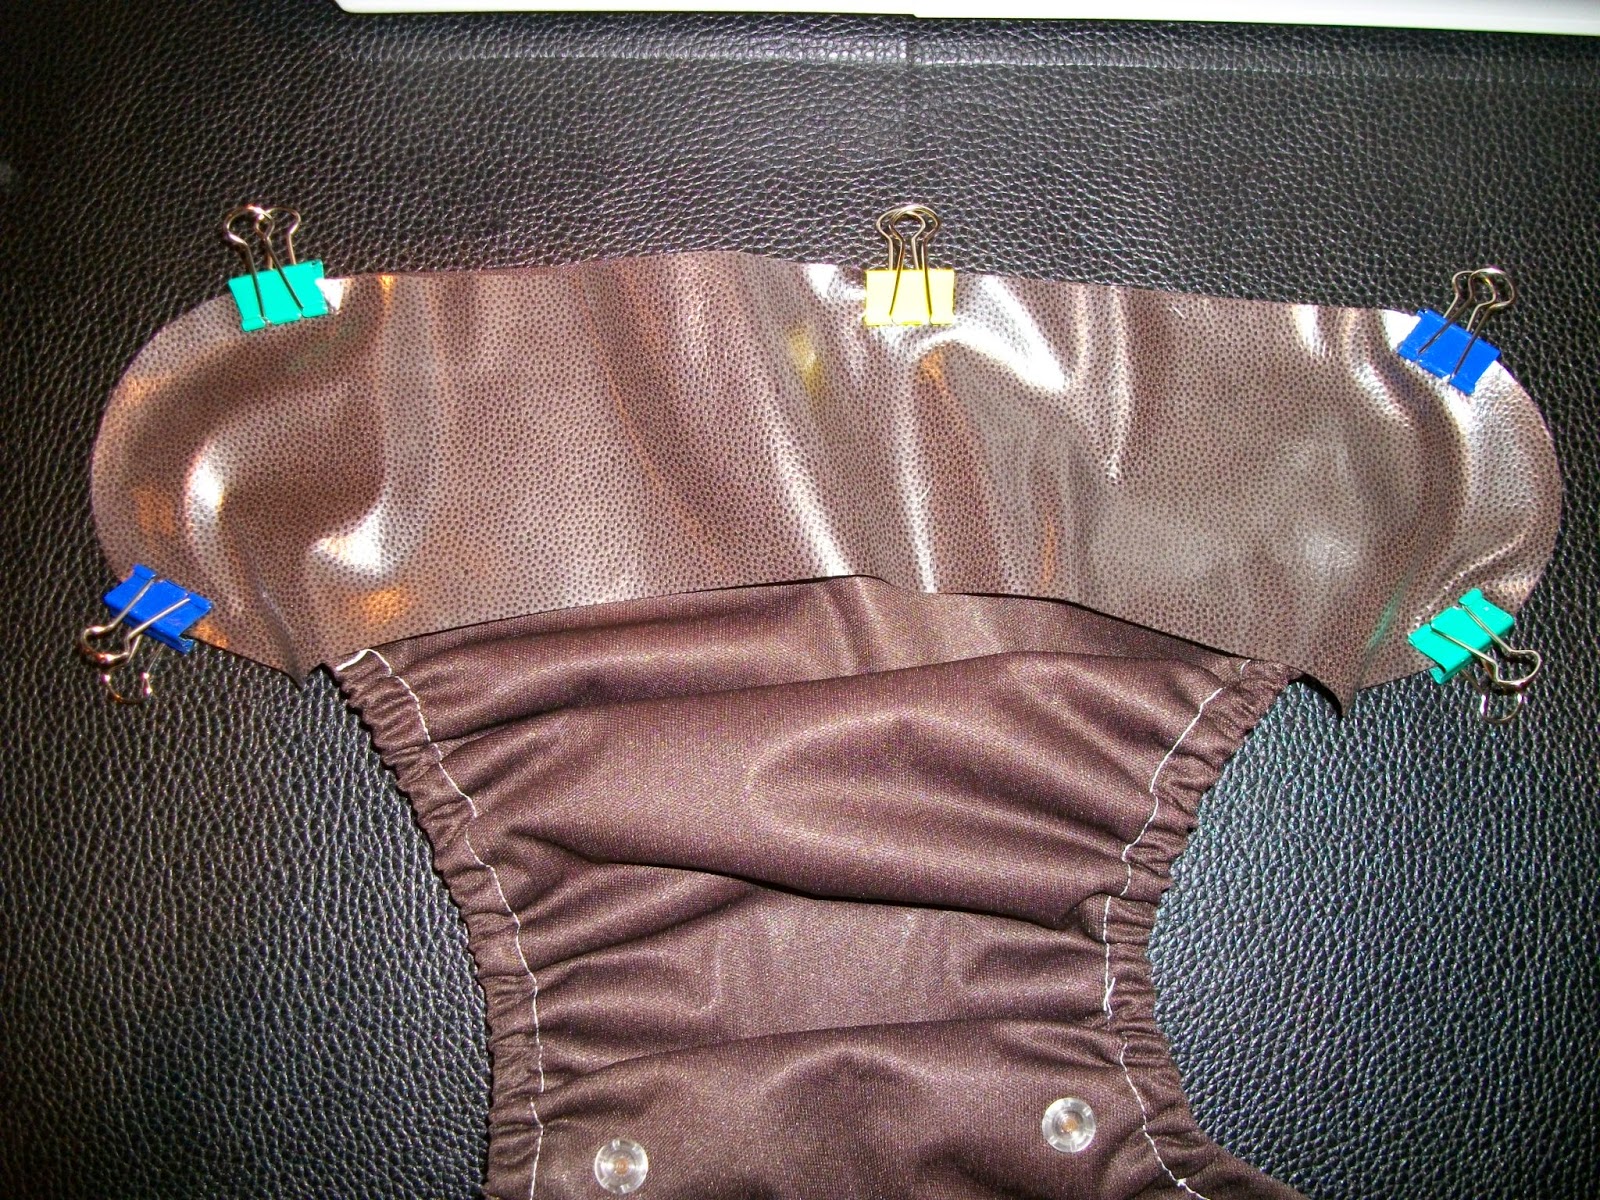
 I had a bit of fun going crazy with the clips.  ;)
 Sew around the outside and then trim your corners before turning.
 Turn through one of the pockets.
 Install your elastic, top-stitch, and add your wing snaps.
 You can reach in the front pocket to pull the soaker through.
  Tuck the extra length when on the smaller rise setting.
Newborn rise.
Small rise.
 Newborn rise next to a Bumgenius Newborn AIO.

All my free template can be downloaded here:

Sunday, February 22, 2015

NB/S Fitted with the new NB/S tuckable cover

I stitched up a NB/S fitted today for that diaper cake give-away.  So, I decided to test it with the new cover pattern to make sure they're a good fit together (like how the FOE NB/S cover is).


Looks good to me!

Templates can be downloaded here:

Friday, February 20, 2015

Newborn-Small Tuckable Cover

There is now a VIDEO tutorial for the tuckable style covers on my YouTube channel.


It assembles just like the OS version.  I have just gotten several requests for a smaller option as well.

Main body PUL piece, snap backing, and front and back flaps.
 Apply your front snaps and/or hook & loop.
 Sew your fold-in elastic casings for the leg elastic.
A walking foot is your friend when sewing PUL to PUL.
 It won't look very pretty until the elastic is installed.
 Install your leg elastics (I used 1/4" poly braided here.)

Time to sew on the top and bottom flaps. 

 Trim a bit around the curves.
 Turn.
 Add back elastic casing and install back elastic.
 Top-stitch.
 Same for the front.


 The top umbilical stump snap and wing snaps go on last.
 Tiny leg holes at the smallest settings.


 One of those soakers from my Freetime-style tutorial.

 Doubled up and larger soakers still fit at the higher rise.


Someone asked to see some sizing comparisons. They were worried this style of cover looks too bulky for a newborn. I used pretty thin PUL fabric, so this cover actually feels trimmer than the actual newborn covers I have used (Thirsties, Prorap, etc.) just because of the thinner more supple fabric.  However, I went down to my loaner stash covers and pulled out a few XS and size 1 or "mini" covers in order to show a visual comparison.  Each cover is stuffed with an identical contoured XS insert/soaker.

Weehuggers mini/XS tuckable cover- Thirsties XS cover
Bumgenius Newborn AIO - my NB/S tuckable cover
 The three covers at full rise and width.

Templates can be downloaded here:

Thursday, February 19, 2015

Freetime-style dual-flap All-In-One

There is now a VIDEO tutorial for this style on my YouTube channel!


Prepare your outer PUL fabric as usual (adding snaps and/or hook & loop.)

For your inner, you will need a non-absorbent full layer of something like suedecloth, poly fleece, minky, etc.  Plus 2.5-3" tall by the full width strips of PUL for across the inside of the front and back.  The absorbent soaker flaps will need to be the length you would use for your Small size soakers and not very wide.  They can be topped with a stay-dry fabric or be left with a natural fabric surface.  Mine are each 2 layers of heavy hemp/cotton fleece with a bamboo fleece layer on the top.
 Center and align your soaker tops with the tops of the PUL strips with the shiny side up.
Sew down the top of the soaker securely to the PUL strips.
 Showing the underside.  Sew with this side down.
 Flip to PUL up and pin/clip your PUL+soaker to the inner body panel.

 Your inner is now all sewn together.
I pin down my soaker flaps so they don't get in the way of the rest of the sewing.
 View of the underside.
 Clip your inside and outside with faces together, and sew together like with any other diaper.
 Front left open for turning:
 Trim your corners before turning.
 Turned outside view:
 Turned inside view:
 Sew your elastic casings, install your elastic, and top-stitch to close up your turning hole.

 Add your wing snaps, and you're done!


All of my free diaper pattern templates can be downloaded here: http://prefold2fitted.blogspot.com/2012/10/online-free-downloads.html