I picked up a bunch of end-of-life Bumgenius 3.0 pockets that needed their aplix and elastic replaced. So, since I've already done a general elastic-replacing tutorial (with pockets you can open them up on the inside though for a cleaner removal), I figured this was a good opportunity to show how I do snap-conversion from aplix to snaps on pre-sewn pocket diapers. :)
First, use your seam-ripper to CAREFULLY remove all the aplix/velcro/hook&loop pieces from the diaper.
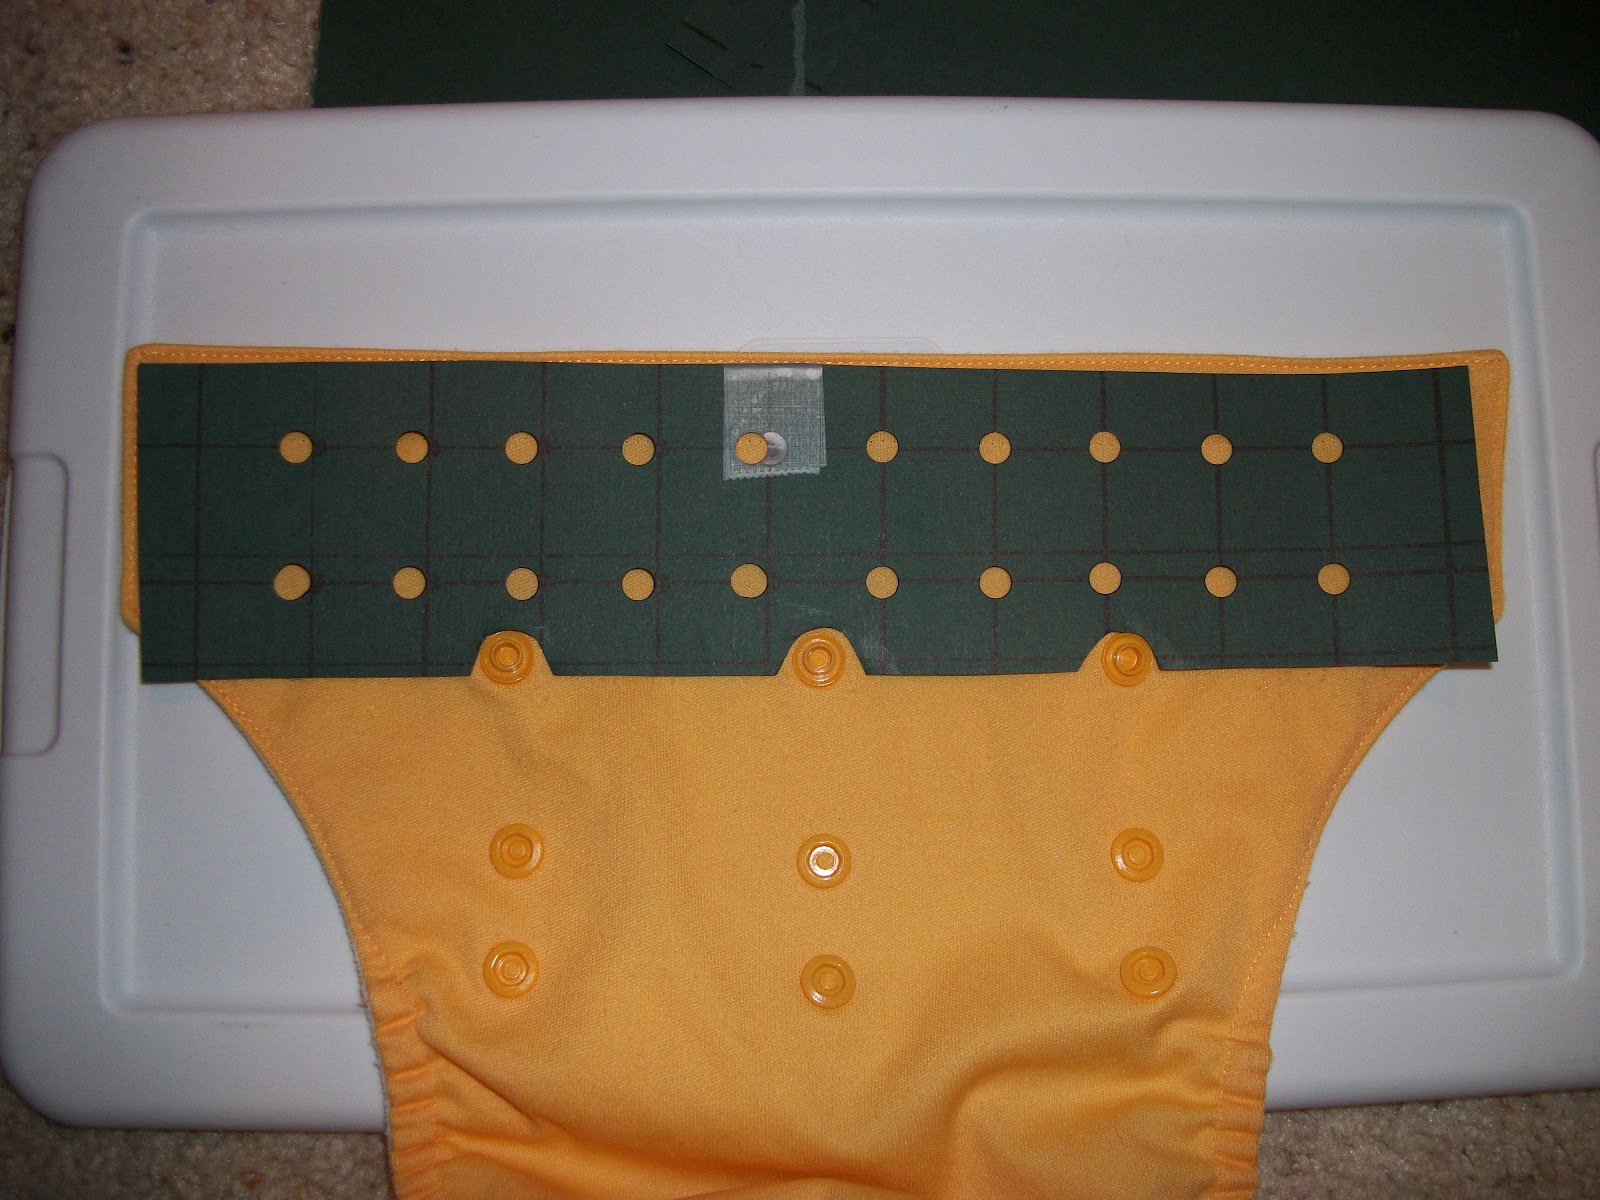
Then mark where you'll be placing the front panel snaps (I use washable pen). I made this little template out of cardstock. The middle holes are 1"x 1 1/8" apart. Then out from there they are 7/8" apart side-to-side and 1 1/8" apart top to bottom. I then cut out notches to fit around the 3 rise snaps to keep the spacing consistent from diaper to diaper. I trim around the outside to fit just inside the edges of the diaper to see well for the most even placement.

To apply your snaps, simply hold a cap in one hand (your left if you are right-handed) and puncture through the PUL side with the awl at your hole marks. Insert the cap through the hole you've just made (from INSIDE the pocket).


Now place your socket onto the cap and remove your hand from the inside of the pocket. Use it to hold the cap and socket together while you press them with your other hand (I use snap pliers, but you can also use a snap press... www.kamsnaps.com).


Continue on all the front socket snaps...

Add your caps and studs to the wings so that they fit easily with the spacing on your front sockets.


And you're done! No sewing involved, and the only seam-ripping is the removal of the aplix. :)
I totally need to do this. Also need to get around to sending you some for FFM. Was wondering how to do the front panel without opening up the top. Thanks!
ReplyDeleteGreat tutorial! I linked to this on my blog because I thought it was so helpful. Love your blog, keep up the good work! diaperstash.tumblr.com
ReplyDeleteI've been searching your tutorials to try and determine what type of snap press you have ;) I've been using the Babyville snaps and snap press, and I'm not super impressed with the quality. Sometimes, I think it is operator error, but they just aren't as smooth or quite as "snappy" (snugness and noise) as the ones on the commercial diapers I own. Do you have a recommendation? Thank you so much for your time.
ReplyDeleteI buy my snaps directly from kamsnaps.com and use their pliers. I have never used a snap press. The BBV you are writing about is also pliers and not a press. Try using nail clippers and snipping off just the very tip of your posts, and you'll likely get a nicer press. :)
DeleteHello, I have a bunch of grovia hybrids to convert to snaps. do you have a download or PDF of the template you used? Would it work on grovia as well? Thank you, Julia
ReplyDeleteNo, but I have a mock Grovia template that you can use for the snap placement. :)
DeleteThanks for this ��
ReplyDeleteI see all of then? directions but where do I find the template or patter
ReplyDeleteDo you mean just for the snap placement for the front panel? They can be spaced however you'd like. Some people even only just do one row. That is totally up to you.
DeleteOr were you not understanding that this was JUST instructions on how to replace old dead hook & loop with snaps? If you want to sew your own diapers. Start at the index page of patterns: https://prefold2fitted.blogspot.com/2012/10/online-free-downloads.html
Delete[Please authorize this post]
ReplyDeleteFor herbal Remedies....Contact him now for a herpes cure.
___________________ r.buckler11@gmail.com …..
I am cured from herpes…it works…