
Main body PUL piece, snap backing, and front and back flaps.

Apply your front snaps and/or hook & loop.

Sew your fold-in elastic casings for the leg elastic.
A walking foot is your friend when sewing PUL to PUL.
A walking foot is your friend when sewing PUL to PUL.

It won't look very pretty until the elastic is installed.

Install your leg elastics (I used 1/4" poly braided here.)


Time to sew on the top and bottom flaps.
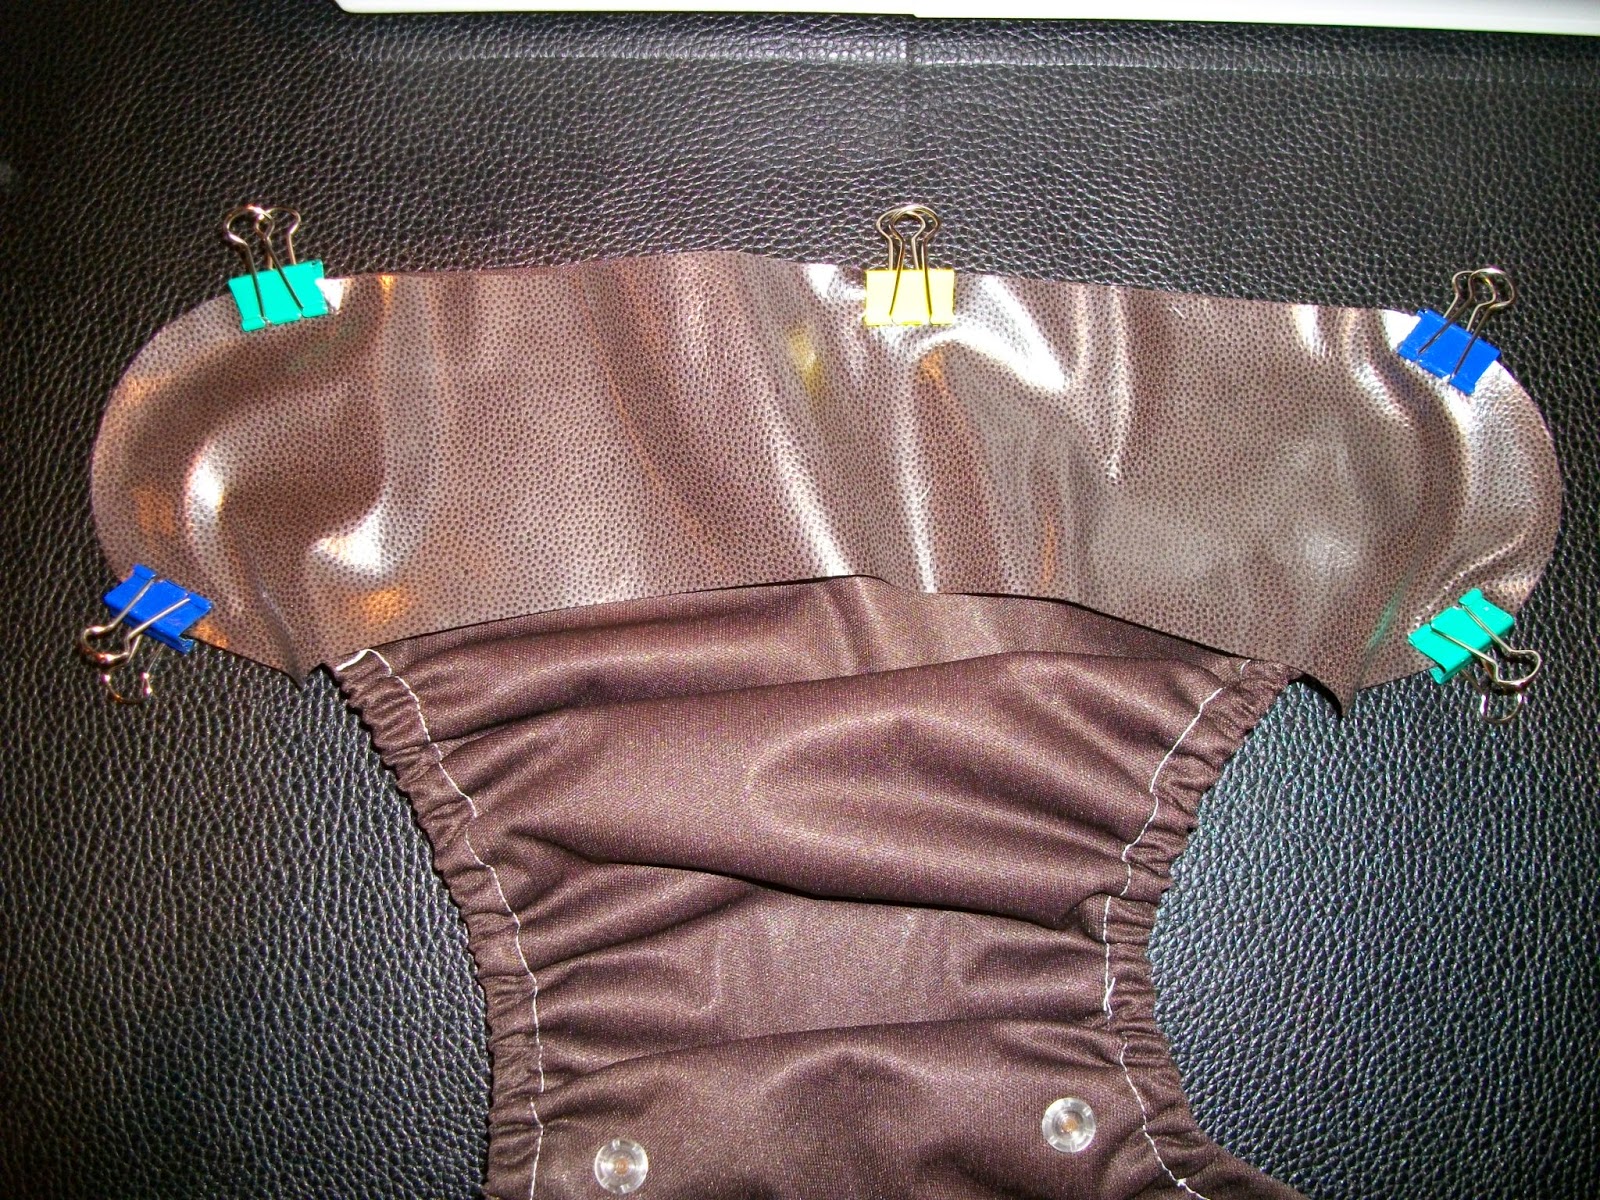

Trim a bit around the curves.

Turn.

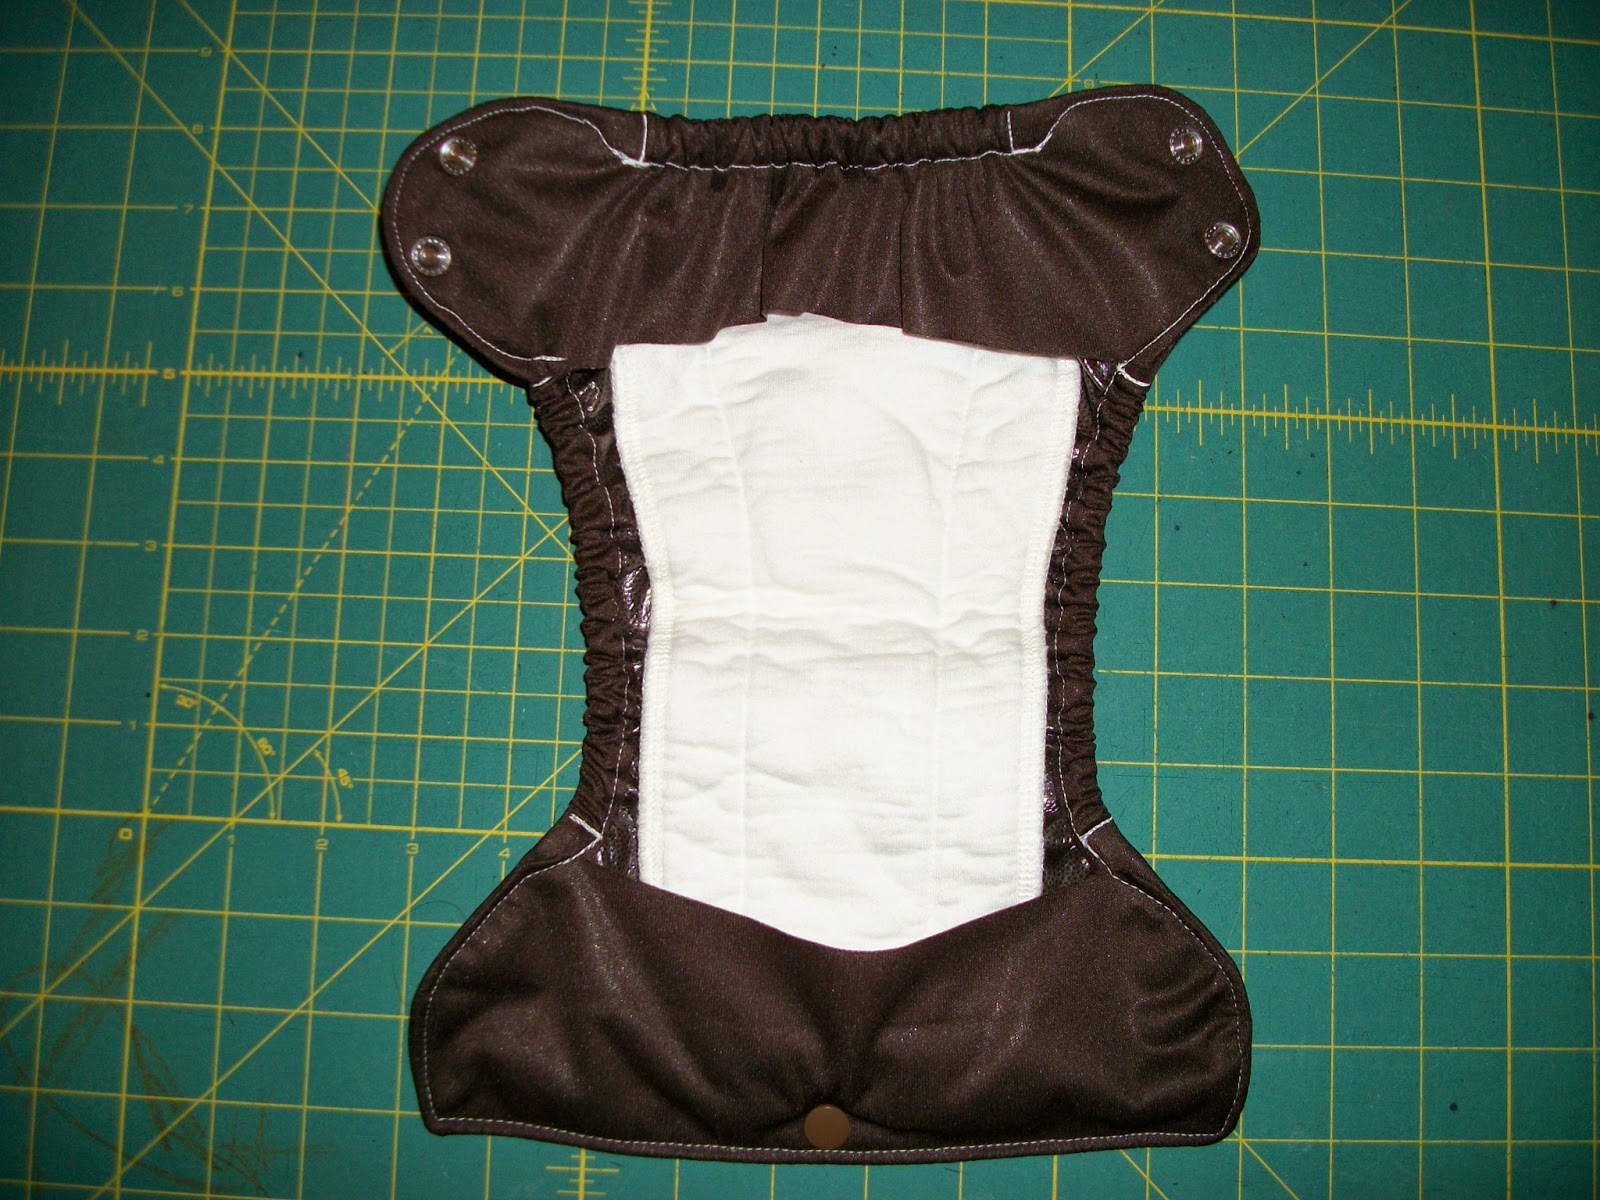
Add back elastic casing and install back elastic.

Top-stitch.

Same for the front.


The top umbilical stump snap and wing snaps go on last.

Tiny leg holes at the smallest settings.


One of those soakers from my Freetime-style tutorial.

Doubled up and larger soakers still fit at the higher rise.


Someone asked to see some sizing comparisons. They were worried this style of cover looks too bulky for a newborn. I used pretty thin PUL fabric, so this cover actually feels trimmer than the actual newborn covers I have used (Thirsties, Prorap, etc.) just because of the thinner more supple fabric. However, I went down to my loaner stash covers and pulled out a few XS and size 1 or "mini" covers in order to show a visual comparison. Each cover is stuffed with an identical contoured XS insert/soaker.
Weehuggers mini/XS tuckable cover- Thirsties XS cover
Bumgenius Newborn AIO - my NB/S tuckable cover

The three covers at full rise and width.

Templates can be downloaded here:
This comment has been removed by the author.
ReplyDeleteNo. They are plastic/resin KAM snaps from kamsnaps.com. You'll want to purchase size 20 snaps and a pair or KAM snap pliers. Snap pliers for other types of snaps will not work.
DeleteAlso, it isn't just that they rust. It is that metal snaps will heat up in the dryer and potentially damage the PUL fabric lamination.
DeleteThis comment has been removed by the author.
DeleteCould you use this pattern and use velcro instead? Any modifications?
ReplyDeleteThe template has the markings for hook and loop as well. It just wouldn't have the umbilical snap-down is all.
DeleteWhat seam allowance do you use when sewing on the flaps? I'm having trouble getting the transition between the leg casings and flaps to line up once turned. Thanks for all the great pictures--just can't tell if they're before or after you trimmed, or if you added a SA to the pattern or something.
ReplyDeleteIt is always included in the pattern templates. I don't usually trim anything for things like these. :)
DeleteWhat length of elastic do you use for the legs and back?
ReplyDeleteI do not ever pre-measure elastic.
DeleteHow many pounds does this diaper fit?
ReplyDeleteHi there! Just to make sure I understand the pattern, i should have 4 separate pieces of cut PULs right? tThe second piece from the left on the first picture is for the snaps right? Sorry I'm new to this and I am planning to create my very first cloth diaper :) Thanks!
ReplyDeleteYep. Like the first photo shows. That one piece is to reinforce the snaps. You use it as a backing for the main body piece. Don't start with this style as your very first diaper. It is way more complicated. Please just take two pieces of flannel or something and do a practice fitted shell using my sewing a diaper start to finish tutorial first. :)
DeleteHi Arfy! Thanks for clarifying! I already have my PUL cut out when I sent you my message but I'm done with my first cover and it turned out ok! I wish I can post a picture so you can see it. You'll be proud of me! :) lol. BTW, I LOVE YOUR BLOG!!!!
DeleteI was just wondering what the snap-backing is for? It looks like it doesn't stop the backs of the buttons from touching baby, so I was just curious if its necessary or I can just leave it out? Thank you in advance! :)
ReplyDeleteIt helps the liquid not wick to the outside of the diaper. It kind of acts like a drain stopper around the snap; it's definitely necessary.
DeleteIt is also to reinforce the snaps. So they don't rip right through a single layer of PUL.
DeleteDo you know approximately how many newborn diapers could be made with one yard of PUL? I've only made one size and have gotten about 6, so I wasn't sure how many more were possible.
ReplyDeleteThis is a really old comment, but I wanted to answer for future readers. I am able to get at least 8 NB diapers covers out of a yard of PUL.
DeleteWhat is the width you're using for the casings? I think I am folding mine over way to far or something. Thanks :)
ReplyDeletePre-measuring won't give you a good fit and will be harder to sew in. What you do, is when you feed the elastic and tack the first end in, you pull it all the way tight, then let out about 1" and then sew down the other end. This will leave it about 75% taught. Good stretch but not too tight. For a cover, you don't want it as tight at the legs as with a fitted, pocket, or AIO where it would be only 1/2" let back out after fully stretching taught.
ReplyDeleteJust curious if anyone has made these and had trouble with urine and poo getting on the flap fabric. I was under the impression this were like flip covers where the cover can be reused with a new insert, but every time I use them stuff gets on the pul that's on the front and back of the inside of the diaper. I have made several of these in newborn but have really been able to use them like I planned. Help please.
ReplyDeleteHi Arfy, what is the name of this pattern? I can't find it in your list of templates. Thanks!
ReplyDeleteIt is there. NB/S Tuckable Cover
DeletePLEASE HELP!!! I followed your instructions on how to print out, but it still seems HUGE and the box around the "1 inch" is not printing so that I can check the size. Neither is the hook & loop lines. What am I doing wrong.
ReplyDeletePlay Live Slots at LuckyClub Casino Site
ReplyDeletePlay free casino slots and win real money at Lucky Club. Find a game that luckyclub.live suits you and wants to share it. Try the games of slots or table games