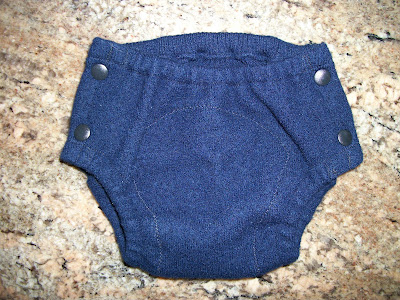
Finished during nap time today...


This tutorial is a little more general than the last and uses many of the same sewing techniques like elastic casing and serged edges.

(optional) Cut out an extra layer for the wet-zone and serge around those edges or just zigzag onto the wetsone area of your wrap fabric. Make sure it is narrow enough to allow for 1.5" outside all sides (for the elastic casing).

First find some 80-100% wool, lambswool, or cashmere sweaters at your local thrift store. L-XL preferred. Then wash on hot with a little detergent, and dry on med-high to felt it up really nicely.
For this example, I just used my general prefitted shape (before you cut off the wing extension rectangles and before you add any elastic). I then added 1.5" to all edges to allow for the cover's elastic casings and the seam allowances at the wings/hips.
This assures that the wrap will fit over the fitted at the highest rise. You can add a little more at the top and bottom (front and back when on) if you'll be using it over a very stuffed fitted for overnights etc. or want a wide waistband.
You'll need 100% polyester thread (to prevent wicking) and polyester braided elastic.
Cut out your wool from the chest or back panel of your sweater (unless you found one with very big arms or are making newborns or small wraps).

(optional) Cut out an extra layer for the wet-zone and serge around those edges or just zigzag onto the wetsone area of your wrap fabric. Make sure it is narrow enough to allow for 1.5" outside all sides (for the elastic casing).


 The view from the outer side:
Thread through (with a safety pin) and tack your leg elastics about 1.5" from the outer edges. I used 1/4" in the legs here.


And you're done! Now they just need to be lanolized.


Great tut, thank you!
ReplyDeleteCUTE!
ReplyDeleteusing this tut today! thx ;)
ReplyDeleteJust what I was looking for thank you!
ReplyDeleteCurious, the extra layer in the wet zone, what is that made of? (asking because it's a different color and does not appear, tho pics don't always show the best details to be wool).
ReplyDeleteIt is just a piece off another wool sweater. I used scraps from other projects for this. :)
DeleteWhich template do I download for this? Thanks
ReplyDeleteWhat kind of stitch are you using to sew this? (Particularly the casing?)
ReplyDelete