
You'll need:
prepped prefolds (any size)
braided polyester elastic (1/4" or 3/8")
a safety pin
washable marker
a sewing machine and a serger (zigzag or overlock can be used as well, but the edges won't be quite the same)

Draw out your rough diaper shape leaving enough room outside the middle seams for your elastic casing (around 1/2-3/4" depending on the elastic you'll use and your prefold size). You'll be using those rectangles on the left edges to extend your wings. The outer arcs will be used for a lay-in doubler/soaker.

Cut off the existing serged ends.
Serge the rectangle pieces to the wings, and then serge down both sides leaving room for your elastic casings. Mark your elastic casing guide points (optional).

Now for those edges...
Unfold the fabric and lay the two sections down together (it should be 4 layers total). Then serge around it making an oval narrow enough to fit inside the diaper's leg casings.


Now back to the diaper's body...
Sew your casing extensions.

Mark your back elastic casing guides.

Rip enough of the prefolds layering seams at the back to open up to the new casing guides you have marked.

Sew your back elastic casings.

Use a safety pin to guide your elastic through the leg casings.
Tack down securely on one end.

Pull to a good tension (I do it so that I can still easily open it all the way but there isn't extra slack). Pin in place about an inch from your guide mark.

Tack down the other end of the elastic and cut off the excess.

Repeat on the other side.

Feed your back elastic through.


Tack down and pull taught the same way you did with the legs elastics.

Tack the other side and serge up the top/back of the diaper.

If you won't be doing snaps, you can serge the front at this point as well, and you're done! Ready to snappi or pin. :D

If you WILL be doing snaps, the following is for a 2 level fold-down rise.
(I use plastic/resin size 20 KAM snaps and KAM snap pliers.)
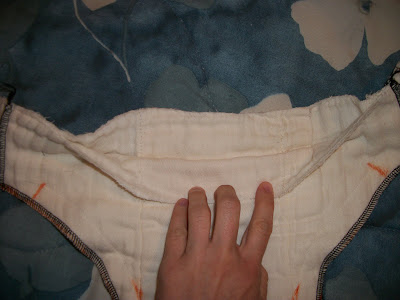
The snap caps will be inserted through these existing openings:

I use a punched cardboard template for all my snap applying needs. ;)

The top row will be applied on one side, and the bottom on the other (front and back).

Hidden caps (through 4 layers in the middle and 2-3 layers on the outsides).

Front:

Back:

Then just serge up that side and you're done! Just wash to get out the washable marker, and they're ready to use!


Can you help me understand the fold down rise bit... like which way the snaps face and pics to see how it is used? I know you're a busy momma too, and I am soooo greatful to have found your new blog!!!
ReplyDeleteThere is a photo showing it at the bottom of one of the pocket fitted tutorials. :)
ReplyDeleteWow! What great tutorials. Thanks!
ReplyDeleteHow big was your prefold before you cut it?
ReplyDeleteThis one for the example was a premium size prefold. However, this technique works with any size prefold. You have to consider that adding elastic shrinks the functional rise though. So, an infant prefold will fit a newborn. A newborn prefold won't work as a prefitted. :)
DeleteOkay. I have osocozy premiums that I want to convert for my 21 lb, 30" tall 1 year old. Do you think it'll work?
ReplyDeleteYep.
DeleteDid you use a template for this diaper? If not, how wide was the crotch before adding the elastics? I too am using a premium sized prefold.
ReplyDeleteDo you have a download for the pattern or the snaps placements?
ReplyDeleteThis is a fantastic tutorial! I was able to take some too big prefolds and make them work much better for us! Thanks for your hard work and making these readily available!
ReplyDeleteThis is a fantastic tutorial! I was able to take some too big prefolds and make them work much better for us! Thanks for your hard work and making these readily available!
ReplyDelete