Wednesday, December 7, 2011

No sewing room for a while means... KNITTING!

Well, many people use wool covers over cloth diapers. They lanolize them to make them hold in the wetness.

So, since my sewing room is out of commission for a while, I decided to do a little knitting.
I have a free basic longies pattern available on ravelry.com:

and this "Sock Monkey Longies" pattern is a pay pattern there.

I have several other knits there as well. :)

Wednesday, November 23, 2011

Well, I won't be sewing for a while....

Our basement flooded tonight. My sewing room was/is in the basement.

Two hours ago it was full of fabric, a cutting table, a bed, a big "L" desk with two sewing machines and a serger....

Now it looks like this:

Tuesday, November 22, 2011

I haven't forgotten!

Things have just been VERY busy. October through mid-November was a BUSY month. We went on a trip to Walt Disney World, I had to sew presents for my son's October birthday, make a newborn stash for a friend's Halloween baby, and I had to sew costumes for a friend's mid-November performance. I also stitched up over a DOZEN bamboo fitteds, 6 PUL covers, some wipes, and some hemp OBV-topped doublers for another friend.

I had to put the SSC on the back-burner for a month, but I did do some pattern revisions and partial mock-ups during that time.

Today I cut out the fabric for the first "final" adult version. The one I'll be taking step-by-step photos of while sewing for the photo tutorial element of that pattern. I still need to "digitize" my template pieces (which are cut out of paper grocery bags currently) too though. :)


Adult buckle and webbing kit:
Deluxe kit add-ons:
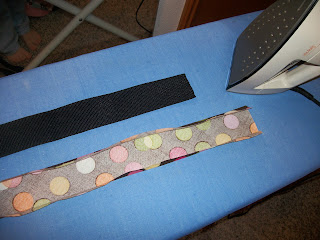
Starting the pre-sewing fabric prep:
Heavy Duty thread I'll be using:
Not pictured yet are the foam and fiber-fill...

Tuesday, October 4, 2011

Child Doll Carriers


They will be free patterns when all completed. :) Over at my other blog childhoodgear.blogspot.com

Wednesday, September 28, 2011

Sneak Peek of something NEW!

Well, since my youngest is now potty-trained... I will soon stop sewing cloth diapers (at least none for my own family). Soooo, I have taken on a few new projects.

One is a quilt that my son requested I sew for him over a year ago made from many of his old character pajamas. He told me I was NOT allowed to give away several of them. So, I am trying to get that done before Christmas for him.

I also have to make him two pairs of pajamas before his birthday (on Halloween).

AND, I promised a friend that I would help her sew some costumes for a stage show that she'll be doing in November.

BUT, lastly is a little project that I have taken on for some of my online sewing friends.
It is an "SSC" or "Soft Structured Carrier." I will be making two adult-size patterns for baby/toddler-wearing... but, I will also be doing matching doll-carrier patterns for kids!
I will also be selling a few "kits" that include buckles, triglides, and the straps (webbing) needed for each pattern.

Here is a little preview graphic of just the INSIDE of the adult carrier (I don't want to give too much away just yet)!

Tuesday, September 6, 2011

Ruffle-butt diaper, cover, or AI2 shell

After posting the pics of the first one, I was asked to do a photo-tutorial while I made the next one. So, here you go. :)

Basically, it is no different than your typical diaper. Just prep a couple extra pieces before sewing the layers together. The ruffle section (I bought pre-layered and pre-gathered lace ruffles by the yard at my local fabric store), and the top printed fabric section.
Fold under the edge of your print fabric and pin in your layers together, with your ruffle below your printed fabric, so that there is enough space between the ruffle and the edge for your seam allowance plus your top-stitching.
Stitch the three layers together.
The view from the back of the top layer (PUL in this case) showing the first seam.
Now do the same with the printed fabric and the main body panel at the top edge. Also leaving enough space for the seam-allowance and the top-stitching.
The view from the back.
If you'll be adding snaps, this would be the time to apply them at the front (waist and rise in this case). For PUL-outer diapers, I use a second partial layer of PUL to back my snaps.
Now the top layer is all prepared. I am doing a fleece-inner cover (could also be an AI2 shell).
Pin up your ruffle (not through the PUL to avoid more punctures... just through the printed fabric) so that you don't catch any of it when sewing your layers together.
Pin or clip your layers together before sewing or serging around the edges. Lay the fabrics face to face for a turned & top-stitched style diaper.
Sew together, leaving the opening across 3/4 of the back at the middle to invert and then for your back-elastic.
Invert.
Sew your elastic casing channels.
Thread through with a safety pin and tack your leg elastics.
Sew your back elastic casing channel.
Thread through the back elastic, tack at the first side, and then sew up most of the top back edge while top-stitching around that side... up until the elastic casing opening.
Pull the elastic tight, tack, and cut.
Sew up and top-stitch the other side.
Add your wing snaps.
Largest setting.
Smallest setting.
I also hand-stitch around the cut edges of my lace at the very end to make sure it doesn't run/fray.

Here it is on a very short-waisted doll: